Bootstrap 和 Parcel
官方指南:如何使用 Parcel 在项目中引入和打包 Bootstrap 的 CSS 和 JavaScript。

想直接跳到最后吗?从 twbs/examples 仓库 下载本指南的源代码和工作演示。你也可以使用 在 StackBlitz 中打开示例,但无法运行它,因为 Parcel 目前不支持该目录。
¥Want to skip to the end? Download the source code and working demo for this guide from the twbs/examples repository. You can also open the example in StackBlitz but not run it because Parcel isn’t currently supported there.
什么是 Parcel?
¥What is Parcel?
Parcel 是一个 Web 应用打包器,旨在通过开箱即用的零配置设置简化开发过程。它提供更高级打包器中的功能,同时注重易用性,是寻求快速入门的开发者的理想选择。
¥Parcel is a web application bundler designed to simplify the development process with a zero-configuration setup out of the box. It offers features found in more advanced bundlers while focusing on ease of use, making it ideal for developers seeking a quick start.
设置
¥Setup
我们正在使用 Bootstrap 从头构建一个 Parcel 项目,因此在真正开始之前,有一些先决条件和前期步骤。本指南要求你安装 Node.js 并熟悉终端。
¥We’re building a Parcel project with Bootstrap from scratch, so there are some prerequisites and upfront steps before we can really get started. This guide requires you to have Node.js installed and some familiarity with the terminal.
-
创建项目文件夹并设置 npm。我们将创建
my-project文件夹并使用-y参数初始化 npm,以避免它询问我们所有交互式问题。¥Create a project folder and set up npm. We'll create the
my-projectfolder and initialize npm with the-yargument to avoid it asking us all the interactive questions.
   mkdir my-project && cd my-project
   npm init -y
-
安装 Parcel。与我们的 Webpack 指南不同,这里只有一个构建工具依赖。Parcel 会在检测到语言转换器(如 Sass)时自动安装它们。我们使用
--save-dev来表示此依赖仅供开发使用,不适用于生产。¥Install Parcel. Unlike our Webpack guide, there’s only a single build tool dependency here. Parcel will automatically install language transformers (like Sass) as it detects them. We use
--save-devto signal that this dependency is only for development use and not for production.
npm i --save-dev parcel
-
安装 Bootstrap。现在我们可以安装 Bootstrap 了。我们还将安装 Popper,因为我们的下拉菜单、弹出窗口和工具提示的定位依赖于它。如果你不打算使用这些组件,可以在此处省略 Popper。
¥Install Bootstrap. Now we can install Bootstrap. We'll also install Popper since our dropdowns, popovers, and tooltips depend on it for their positioning. If you don’t plan on using those components, you can omit Popper here.
npm i --save bootstrap @popperjs/core
现在我们已经安装了所有必要的依赖,我们可以开始创建项目文件并导入 Bootstrap。
¥Now that we have all the necessary dependencies installed, we can get to work creating the project files and importing Bootstrap.
项目结构
¥Project structure
我们已经创建了 my-project 文件夹并初始化了 npm。现在我们还将创建 src 文件夹、样式表和 JavaScript 文件来完善项目结构。从 my-project 运行以下命令,或手动创建如下所示的文件夹和文件结构。
¥We’ve already created the my-project folder and initialized npm. Now we'll also create our src folder, stylesheet, and JavaScript file to round out the project structure. Run the following from my-project, or manually create the folder and file structure shown below.
mkdir {src,src/js,src/scss}
touch src/index.html src/js/main.js src/scss/styles.scss
完成后,你的完整项目应如下所示:
¥When you’re done, your complete project should look like this:
my-project/
├── src/
│   ├── js/
│   │   └── main.js
│   ├── scss/
│   │   └── styles.scss
│   └── index.html
├── package-lock.json
└── package.json
此时,一切都已就绪,但 Parcel 需要 HTML 页面和 npm 脚本来启动我们的服务器。
¥At this point, everything is in the right place, but Parcel needs an HTML page and npm script to start our server.
配置 Parcel
¥Configure Parcel
安装依赖并准备好项目文件夹以开始编码后,我们现在可以配置 Parcel 并在本地运行我们的项目。Parcel 本身在设计上不需要配置文件,但我们确实需要一个 npm 脚本和一个 HTML 文件来启动我们的服务器。
¥With dependencies installed and our project folder ready for us to start coding, we can now configure Parcel and run our project locally. Parcel itself requires no configuration file by design, but we do need an npm script and an HTML file to start our server.
-
填写
src/index.html文件。Parcel 需要一个页面来渲染,因此我们使用index.html页面来设置一些基本的 HTML,包括 CSS 和 JavaScript 文件。¥Fill in the
src/index.htmlfile. Parcel needs a page to render, so we use ourindex.htmlpage to set up some basic HTML, including our CSS and JavaScript files.
<!doctype html>
<html lang="en">
<head>
<meta charset="utf-8">
<meta name="viewport" content="width=device-width, initial-scale=1">
<title>Bootstrap w/ Parcel</title>
<link rel="stylesheet" href="scss/styles.scss">
<script type="module" src="js/main.js"></script>
</head>
<body>
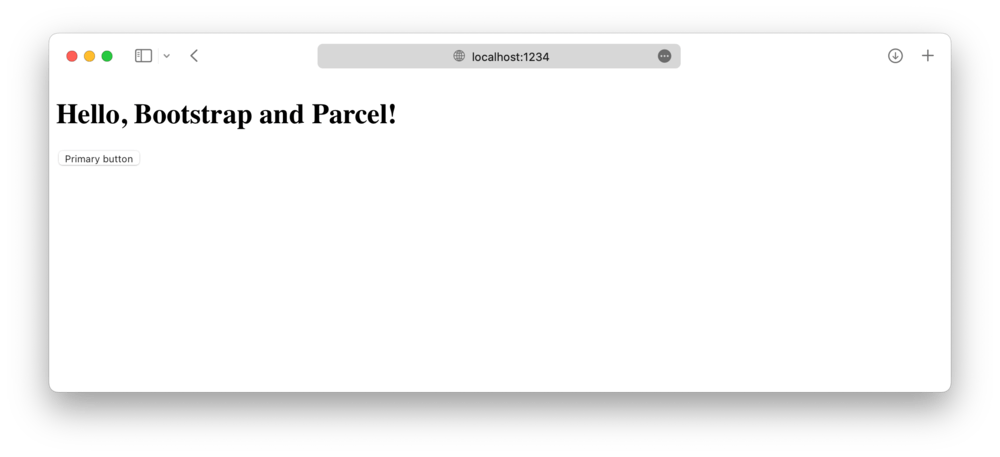
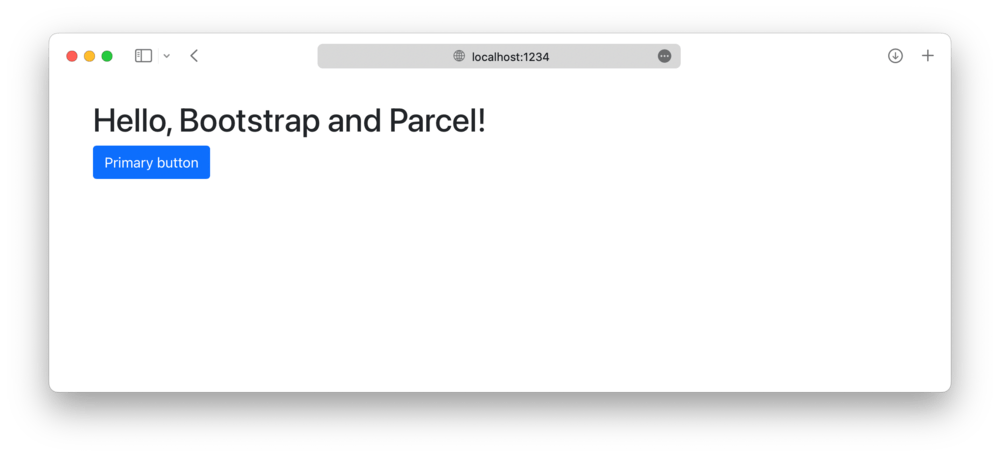
<div class="container py-4 px-3 mx-auto">
<h1>Hello, Bootstrap and Parcel!</h1>
<button class="btn btn-primary">Primary button</button>
</div>
</body>
</html>
我们在 div class="container" 和 <button> 中添加了一些 Bootstrap 样式,以便我们能够看到 Parcel 加载 Bootstrap CSS 的时间。
¥We’re including a little bit of Bootstrap styling here with the div class="container" and <button> so that we see when Bootstrap’s CSS is loaded by Parcel.
Parcel 将自动检测我们正在使用 Sass,并安装 Sass Parcel 插件 以支持它。但是,如果你愿意,你也可以手动运行 npm i --save-dev @parcel/transformer-sass。
¥Parcel will automatically detect we’re using Sass and install the Sass Parcel plugin to support it. However, if you wish, you can also manually run npm i --save-dev @parcel/transformer-sass.
-
添加 Parcel npm 脚本。打开
package.json并将以下start脚本添加到scripts对象。我们将使用此脚本启动 Parcel 开发服务器,并在编译到dist目录后渲染我们创建的 HTML 文件。¥Add the Parcel npm scripts. Open the
package.jsonand add the followingstartscript to thescriptsobject. We'll use this script to start our Parcel development server and render the HTML file we created after it’s compiled into thedistdirectory.
   {
      // ...
      "scripts": {
        "start": "parcel serve src/index.html --public-url / --dist-dir dist",
        "test": "echo \"Error: no test specified\" && exit 1"
      },
      // ...
   }
-
最后,我们可以启动 Parcel。从终端的
my-project文件夹中,运行新添加的 npm 脚本:¥And finally, we can start Parcel. From the
my-projectfolder in your terminal, run that newly added npm script:
npm start
在本指南的下一部分也是最后一部分中,我们将导入 Bootstrap 的所有 CSS 和 JavaScript。
¥In the next and final section to this guide, we'll import all of Bootstrap’s CSS and JavaScript.
导入 Bootstrap
¥Import Bootstrap
将 Bootstrap 导入 Parcel 需要两次导入,一次导入到我们的 styles.scss,一次导入到我们的 main.js。
¥Importing Bootstrap into Parcel requires two imports, one into our styles.scss and one into our main.js.
-
导入 Bootstrap 的 CSS。将以下内容添加到
src/scss/styles.scss以导入 Bootstrap 的所有源 Sass。¥Import Bootstrap’s CSS. Add the following to
src/scss/styles.scssto import all of Bootstrap’s source Sass.
   // Import all of Bootstrap’s CSS
   @import "bootstrap/scss/bootstrap";
如果需要,你还可以单独导入我们的样式表。阅读我们的 Sass 导入文档 了解详情。
¥You can also import our stylesheets individually if you want. Read our Sass import docs for details.
可选:你可能会在最新版本的 Dart Sass 中看到 Sass 弃用警告。可以通过在根文件夹中的 .sassrc.js 文件中添加以下配置来禁用这些断点:
¥Optional: You may see Sass deprecation warnings with the latest versions of Dart Sass. These can silenced by adding the following configuration in a .sassrc.js file in the root folder with the following:
   module.exports = {
     silenceDeprecations: ['import', 'mixed-decls', 'color-functions', 'global-builtin']
   }
-
导入 Bootstrap 的 JS。将以下内容添加到
src/js/main.js以导入 Bootstrap 的所有 JS。Popper 将通过 Bootstrap 自动导入。¥Import Bootstrap’s JS. Add the following to
src/js/main.jsto import all of Bootstrap’s JS. Popper will be imported automatically through Bootstrap.
   // Import all of Bootstrap’s JS
   import * as bootstrap from 'bootstrap'
你还可以根据需要单独导入 JavaScript 插件,以缩小包大小:
¥You can also import JavaScript plugins individually as needed to keep bundle sizes down:
   import Alert from 'bootstrap/js/dist/alert'

   // or, specify which plugins you need:
   import { Tooltip, Toast, Popover } from 'bootstrap'
阅读我们的 JavaScript 文档 提供更多关于如何使用 Bootstrap 插件的信息。
¥Read our JavaScript docs for more information on how to use Bootstrap’s plugins.
-
大功告成!🎉 在 Bootstrap 的源 Sass 和 JS 完全加载后,你的本地开发服务器现在应该如下所示:
¥And you’re done! 🎉 With Bootstrap’s source Sass and JS fully loaded, your local development server should now look like this:
现在你可以开始添加你想要使用的任何 Bootstrap 组件。请务必参考 查看完整的 Parcel 示例项目,了解如何添加额外的自定义 Sass,并通过仅导入 Bootstrap 所需的 CSS 和 JS 部分来优化构建。
¥Now you can start adding any Bootstrap components you want to use. Be sure to check out the complete Parcel example project for how to include additional custom Sass and optimize your build by importing only the parts of Bootstrap’s CSS and JS that you need.
See something wrong or out of date here? Please open an issue on GitHub. Need help troubleshooting? Search or start a discussion on GitHub.